Transferring Patches to a Yamaha DX100 with Sysex and a PC
Posted on

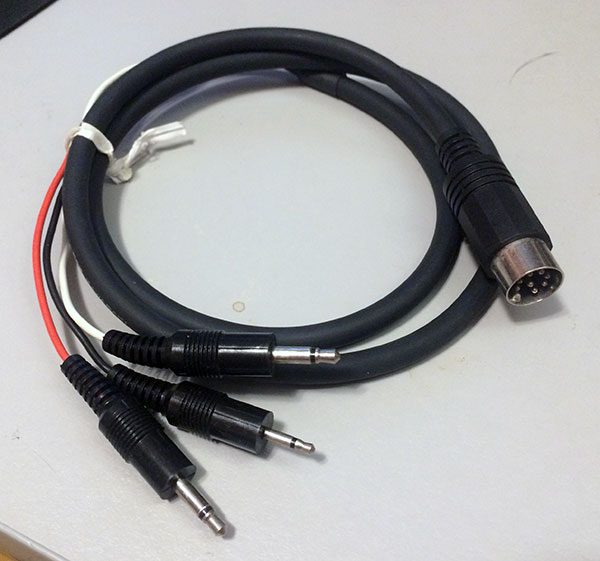
On this site, I had previously posted a set of 24 Yamaha DX100 synth patches for download. The DX is a notoriously difficult synthesizer to program. That difficulty extends to its load/save workflow as well. Originally, the DX100 came with a special cord with a MIDI-style plug on one end and three headphone-sized jacks on the other. This is meant to be plugged into a data cassette recorder. The red cable is audio out, the white is audio in, and the black (I assume) controls the tape player. You hit a button combo on the DX100 and then a screeching modem sound is output to the tape. Modern users can record this sound on a computer as a .WAV file and it will work the same as and old-school tape deck. This works okay, but there is a better way to archive and reload sounds.

Meet Sysex

Sysex stands for system exclusive and it’s a part of the MIDI standard that allows synth manufacturers to define their own specific message formats. In our case it is useful because the DX100 uses sysex to store and retrieve patches. With some free software and a cheap hardware interface, you can easily store and retrieve synth sounds on your PC as both individual patches and a complete 24 patch bank.


Requirements

A Yamaha DX100 Synthesizer

A DX27 should also use the same data, but I have not tested that.

A MIDI Interface

I opted to go the cheapest possible route and bought a Roland UM-One from Sweetwater. This cable is a USB connector on one end and MIDI In/Out on the other.

Connect your DX to the PC and all the sudden you can control VSTs with the DX or send sequences from your favorite DAW to the synth. I have Windows 10, and this worked perfectly with no special set up or drivers needed.

Bome SendSX

This is a tiny, powerful software utility that does two things. It reads and sends sysex data. You can actually see the data flowing in as you play the keyboard. Your playing is translated into beautiful hex values instantaneously. Download Bome SendSx for free!


Saving All Your Patches at Once to PC

On the Yamaha DX100 user patches are saved in the Internal bank of 24 patches. These are typically accessed by pressing the internal button and then any of the 24 green numbered buttons. To save all 24 of these patches at once do the following:

Step 1: Connect The Hardware

Connect your DX100 to the PC using the MIDI interface

Step 2: Enable Sysex

On your DX100 press the brown Function/Compare button.DX100 FunctionYou’ll know you are in function mode because there will be an uppercase F in the left side of the screen. When function mode is enabled, the number buttons correlate the function listed in below each button.

Press the Sys Info key (green key #5).

DX100 SysInfo

The screen should say Sys.Info:on. If it is set to off, press the +1 Yes key to turn it on.

DX100 Yes

I think it’s pretty safe to just always leave this on.

Step 3: Get Ready to Transmit MIDI

Press the Sys Info key again until the screen displays Midi Transmit?

Step 4: Set up SendSX to Receive Data

Back on your PC, open SendSX and, under Options, make sure that MIDI Thru is unchecked.
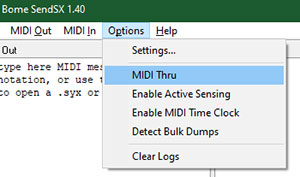
Click the Clear In button to erase any data in the IN window.
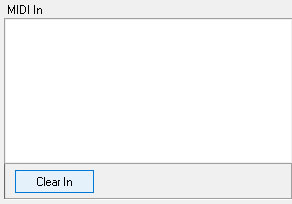
The Midi In pane should be empty and SendSX is ready to receive data.

Step 5: Transmit Your Patches

While the screen reads Midi Transmit? on your DX100, press the +1 Yes button to transmit your data to the PC.

DX100 Yes

And don’t touch anything else on your DX! You will now see a bunch of hex values in the Midi In pane in SendSX and a success message.
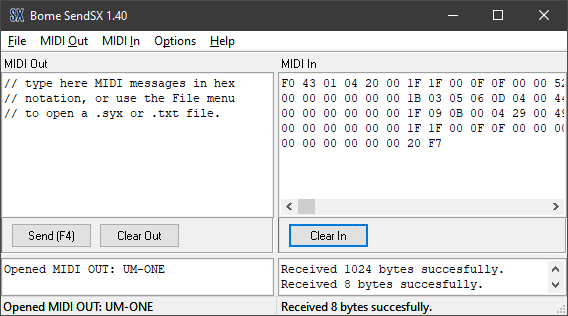
Step 6: Save the Data on Your PC

From the SendSX File menu chose Save Midi In to save your patches on your computer as a .SYX file (or TXT if you want).


Saving a Single Patch to PC

Saving a single patch is a little easier. The simple act of switching patches instantly transmits that patch’s sysex info over MIDI. Just make sure to follow steps 1–2 above to turn on Sys.Info:on. Detailed steps are as follows:

Step 1: Locate Your Patch

On your DX100 find the patch you want to save. It can be any of the 192 factory patches or any of 24 user-programmed internal slots. Let’s say I want to save internal patch 14. I press internal then button 14.

Step 2: Set up SendSX to Receive Data

Same as Step 4 above. Open SendSX your your PC and click the Clear In button and insure MIDI Thru is disabled

Step 3: Transmit Your Patch’s Data

Press just the number key of your chosen patch again. In my example, I’d press button 14 again. As before, don’t touch anything else on your DX after hitting the number button!
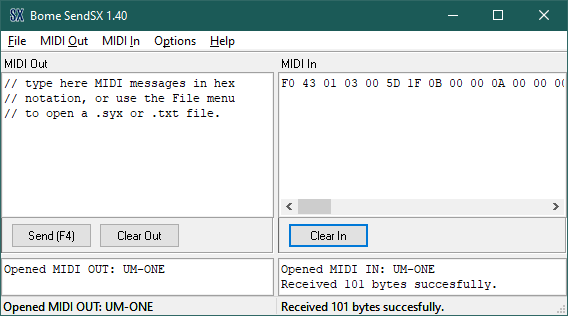
You should now see a bunch of hex values in the Midi In pane in SendSX and a success message. The hex string should be shorter than before (around 101 bytes).

Step 4: Save Your .SYX File

From the SendSX FILE menu chose Save Midi In to save your patch on your computer as a .SYX file as you did with the complete bank save.


Transferring a Set of Patches from your PC to the DX100

Transferring patches from your PC to your DX100 is also handled by SendSX.

Step 1: Prepare SendSX for the Transfer

Open SendSX and click the Clear Out button to erase the contents of the Midi Out pane.

Go to File then Open to find and open your saved .SYX file.
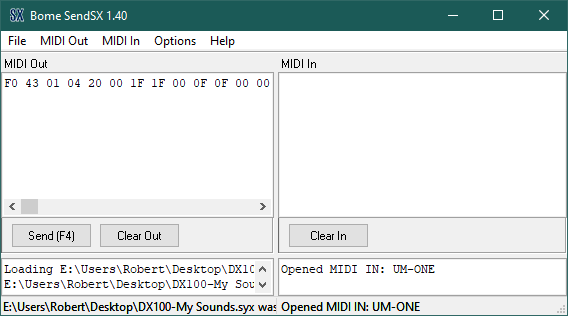
Opening the file will populate the Midi Out pane with hex values.

Step 2: Turn Off Memory Protection on the DX100

On your DX we need to turn off Memory Protection mode by pressing the brown Function buttonDX100 Function  and then the Memory Protect button (number 12) .

DX100 Memory Protect

The screen will probably read M.Protect:on. Switch this to off by pressing the -1 No Key.

It should now read M.Protect:off. From this point on be careful because, with memory protection off, it is possible to delete or alter saved patches.

Step 3: Transmit Your Patches

In SendSX click the Send(F4) button. It doesn’t matter what you are doing on the synthesizer. If memory protection is off, the Internal patch bank will be replaced with the saved sysex data.

Step 4: Turn Memory Protection Back On

Turn Memory Protection back on to prevent an accidental erasing of patches. Press Function then Memory Protect then +1 Yes to reenable it.


And Finally… Loading a Single Patch to the DX100

Follow the steps 1–2 above to load your single patch into SendSX and turn off Memory Protection on the DX.

Step 3: Select Your Patch Location

Get your DX100 ready to receive data by selecting the internal patch location that you want to overwrite. Press Internal button then any of the 24 number buttons.

Step 4: Transmit the Data From SendSX

In SendSX click the Send(F4) button. The DX will now have the patch loaded and selected in the slot location from the previous step. If you play the keyboard you will hear your loaded patch, but…

Step 5: Save Your New Patch on the DX100

Your patch will not be saved just yet. If you switch to another patch, the sysex loaded patch will vanish from memory! You need to save the patch in the same manner you would save any edited sound.

Press Function button then the reddish Store button and select the internal slot in which you want the patch saved. This will probably be the same number that you selected in step #4.

For example the screen will say Mem Store 2→?. Press the Number 2 button and the patch will be saved in internal slot #2.

Note: You don’t necessarily need to be in Function mode to save a sound. You just want to be sure you are not in Edit mode because then the Store button becomes the EG Copy button.

Step 6: Turn Memory Protection Back On

Turn Memory Protection back on to prevent an accidental erasing of patches. Press Function then Memory Protect then +1 Yes to reenable it.

In Conclusion…

Well, that was a lot of info. Trust me it’s not that difficult. I just like to break tutorials up into very detailed steps to make sure you understand everything you are doing. Now if you want to download some of my custom DX100 patches download the .ZIP below which contains all the sounds from this post as both a complete 24 patch bank and 24 individual patches.

Revisiting Old Music: Mission Accomplished

Posted on

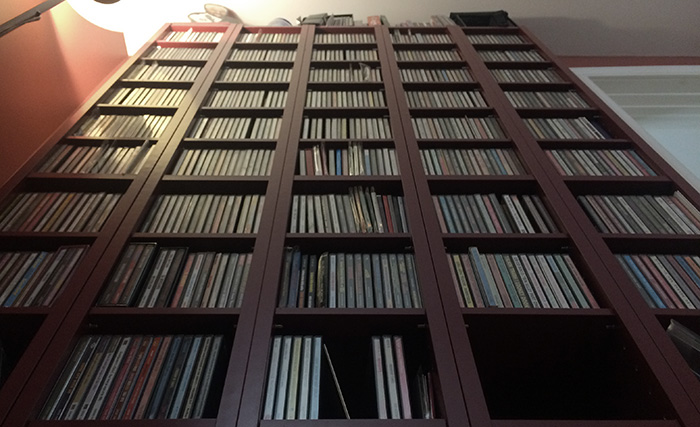
Well, it only took me twelve years. I have finally finished my quest to re-listen to my entire CD collection. This really didn’t need to take more than decade, but in the middle of the process I decided to start reviewing each CD individually. After a while the thought of having to type a new review if I listened to a disc would discourage me from continuing. I finally gave up somewhere in compilations. The world doesn’t need to know that each of the eight or so Back from the Grave compilations sounds pretty much like all the other ones. On top of that, there was an excursion into my vinyl collection in which I ripped all my 45s and then started in on my LPs too. Who knew listening to music was such hard work.

My final thoughts are that I like most of the music that I have bought. Who’da thunk it? At the very bottom there a few stinkers which I keep mainly because either they are my wife’s (A Very Special ChristmasLou Reed) or they have maybe one song that’s worth listening to (Planet PLambadaBob Mould solo crap). I also have a box of freebies that bands have given me and junky Lumpen Media compilations which are mostly crap but I need to keep for archival reasons.

CDs are getting a bad rap these days. Other than a good old fashioned punk rock 45, I still think CD is my preferred format for physical media music. If anyone tells you vinyl sounds better, they are lying. I only wish that instead of jewel cases they were packaged in thinner sleeves. A little known benefit of CDs is that they don’t really appreciate in value which means they are super cheap to buy used. Often cheaper than MP3 albums (Discogs is a great way of building up a killer rare CD collection).

“March of the Mustard King” Official Video

Posted on

20 years ago this month I released an album’s worth of computer music. If you weren’t one of the lucky 3 people who got a CD, this is what you missed. Last night I made an *official video* for the song “March of the Mustard King.” This was pre-Garage Band. Back when making songs on a computer was like watching the code of the Matrix scroll by. Music by nerd(s), for nerds.

This is a track from my first album of computer music called, “The Exciting Sounds of a Compaq P133” (1999). The music was created in FastTracker ][ on a Windows 98 PC. This video is showing the excellent FastTracker ][ Clone from 16-bits.org.

How to Import Books to an iPad 1 (Without iTunes)

Posted on

Update (June 2020): All of the sudden, iTunes started supporting books on the iPad 1 again so this article is mostly moot. I leave it here for posterity.

Apple has a history of abandoning users whenever they introduce a new product to the market. This wasn’t always the case. The Apple IIgs, despite its 16-bit architecture, allowed for most of the old 8-bit Apple ][ software to run on the new system. However, since the introduction of OSX, the attitude  has been, “Deal with it old-timers. We know what’s best for you.”

I am the proud owner of a first generation iPad 1. I use it to play music and read eBooks. It performs these two tasks as well as any modern iPad or iPhone does. Alas, in their attempt streamline the software, Apple removed to ability to transfer PDFs and eBooks to an iPad 1 from iTunes. The entire Books section has been removed from the product with the expectation that iPad users will now get their content from the cloud. The problem is that iCloud, Dropbox and other cloud storage systems no longer work on an iPad 1.

My attempts to Google a solution have had mixed results. Apple is no help. The user help forums are filled with bad advice. In my frustration I have figured out a relatively simple way to get files, especially books, to your iPad 1. In a nutshell, we are going to create a web page containing links to all your books and then, assuming your computer and ipad are on the same local wi-fi network, browse to that web site on our iPad to download the files to iBooks.

The only catch here is that the process requires you to download a piece of software to your Mac or PC. The application is called Prepros. It is free to download and use from Prepros.io. It is an excellent piece of software that is normally a tool used for Web development to pre-process code and make it ready for a Web page. But we are going to use it as our file server.

Step 1: Download, Install and Run Prepros

If installing an application is too complicated for you, maybe you should stick to paper books.

Step 2: Organize Files for Transfer

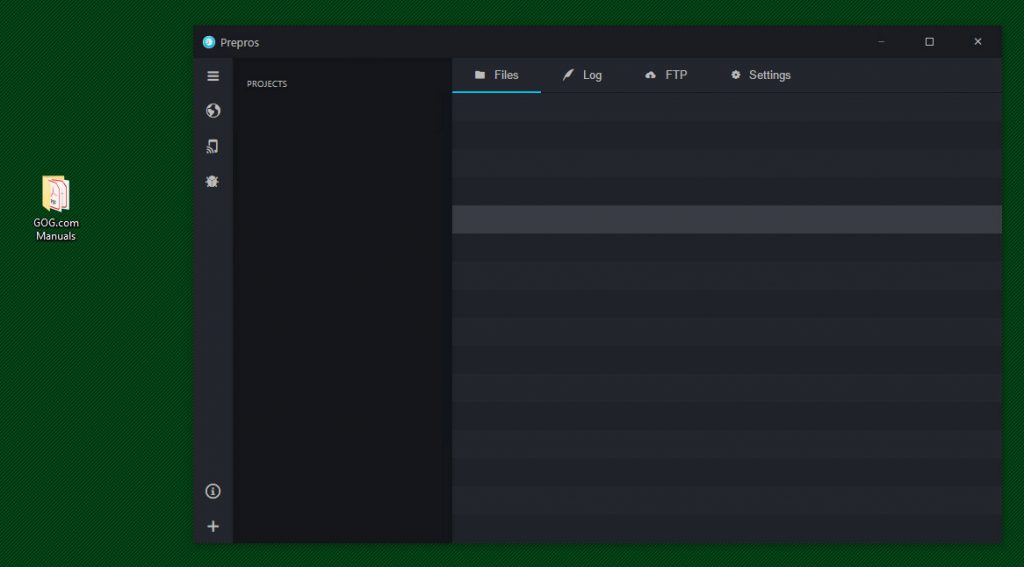
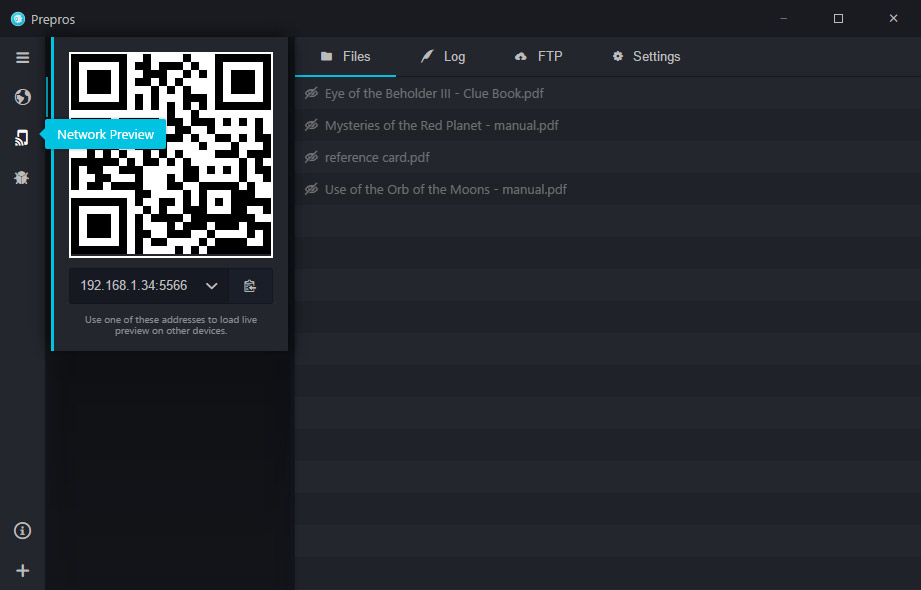
Put any files that you want to transfer to your iPad in a single folder. In my example I have put a bunch of PDFs into a folder on my desktop called “GOG.com Manuals.” Here’s my folder next to the open Prepros app window:

Step 3: Drag and Drop your Folder into Prepros

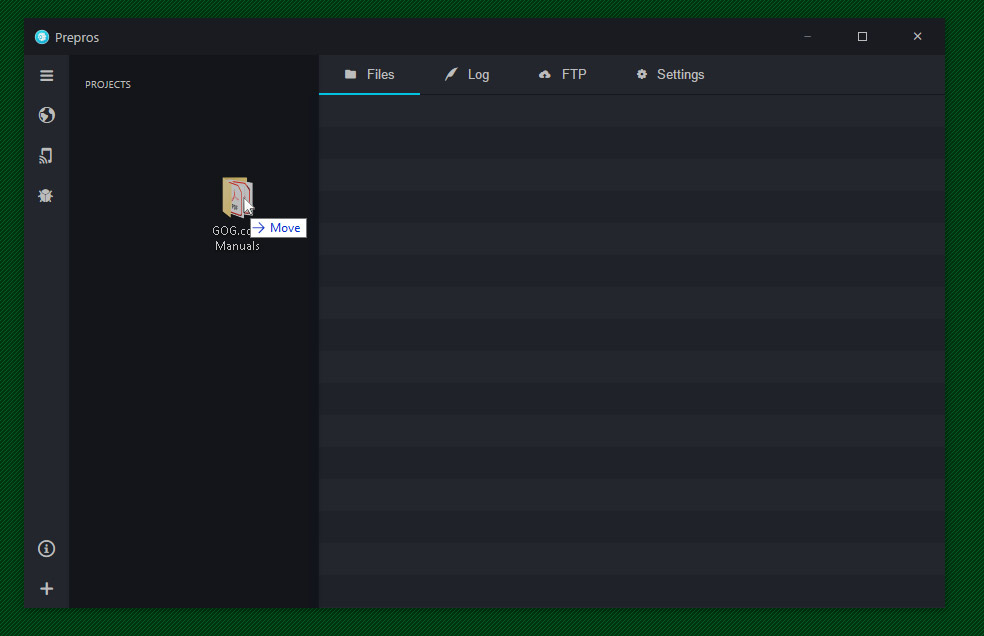
Drag your folder into the Prepros window and drop it into the “Projects” panel.

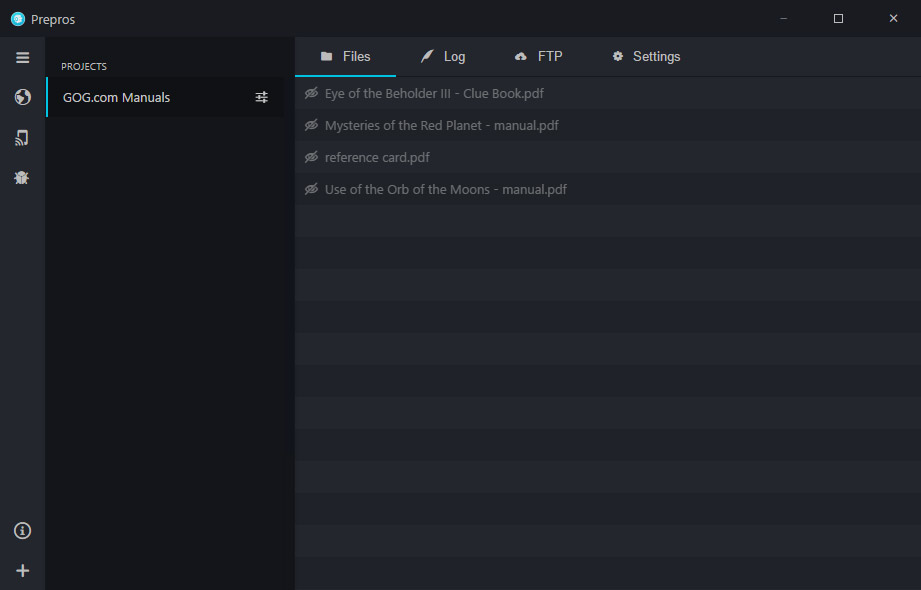
Your folder will now appear as a “Project” with any files from the folder listed in the right panel under “Files.”

Step 4: Start the File Server

We are now going to start a local network file server by clicking the Network Preview icon (looks like a Wi-fi/Phone) on the left side of the window:

If an iPad 1 had a camera we could scan the big QR code, but for us old-timers, an IP address is provided in the popup. Note the number in the box. In the above example the IP address is 192.168.1.34:5566

Step 5: Type the IP Address into Safari on your iPad 1

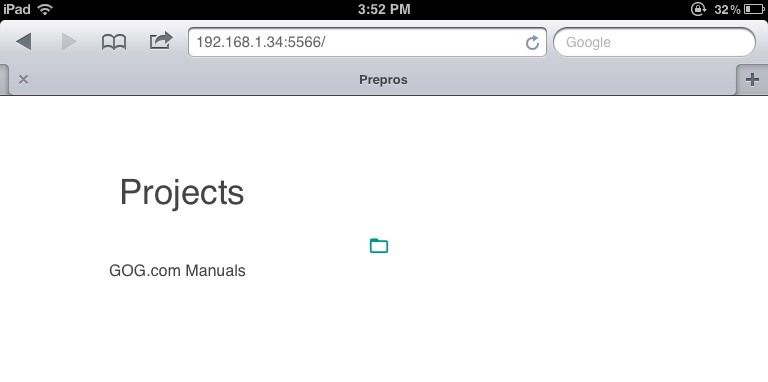
Turn on your (wi-fi connected) iPad, open Safari and enter the IP address into the location bar. Your Prepros file server will appear as a Web page:

Tap on the appropriate folder to see your list files. In this example, there is only my “GOG.com Manuals” directory.

Step 6: Tap on the File you Want to Transfer to iBooks

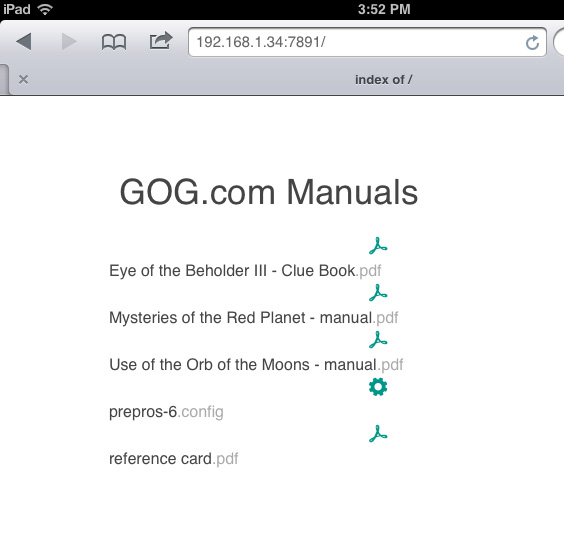
Your files from your PC or Mac should now be visible (there will also be a file called prepros-6.config, ignore that). Tap on the PDF you want to open the PDF in Safari:

Step 7: Tap the Open in iBooks Button

The PDF will render in the Safari window. A couple of buttons will also appear at the top of the PDF which will allow you to transfer the PDF into your iBooks library. If the buttons aren’t visible tap the PDF page to make them reappear. Tap the Open in iBooks button:

Step 8: Enjoy your eBook on your iPad!

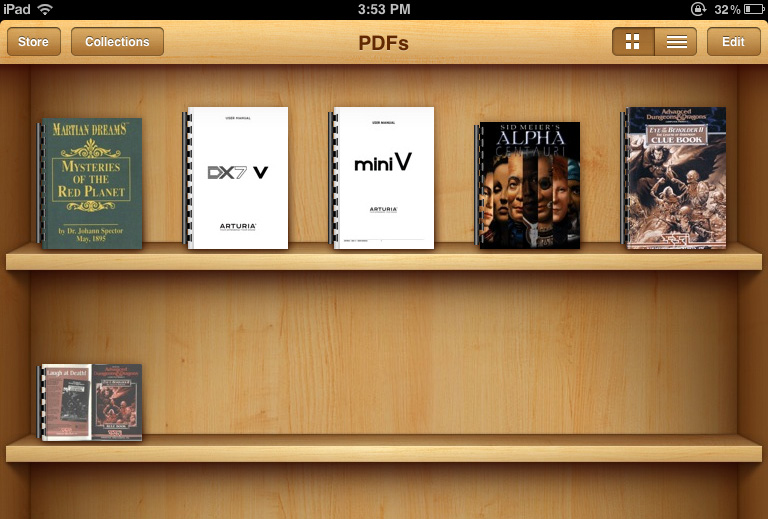
The iPad should automagically switch to iBooks and your PDF/ebook will appear on your shelves. You can keep transferring books, or, if you are done, close out of Safari and exit Prepros on your computer. The book is now permanently on your iPad.

I know this seems like a lot of steps, but I want to be thorough. In this age of command line interfaces, detailed tutorials are hard to come by.

P.S. If you like Prepros, please buy it. It is one of the only shareware programs I have ever bought and I use it every single day as a Web developer.

Goodbye Old Friend

Posted on

It’s been just about a year since I purchased The Witcher 3 from GOG.com and I have finally finished the DLC content. The Blood and Wine expansion like getting a completely new game world to explore. Worth every penny. But alas, I think it’s time to uninstall this fantastic game. I suppose I could keep going to try to complete all the achievements but my time and SSD space is limited. For now I will patiently await the release of Cyberpunk 2077. On the up-side, I will never be forced to play a boring round of Gwent again.

Apple ][ Graphic Adventure Part V

Posted on

Now that my memory issues are seemingly under control, let’s take a look at my modifications to the parser. Normally, in these types of graphical adventures the player enters two words in the form of VERB OBJECT. My interface limits the number of verb choices and allows the player to enter a verb with a single keystroke.

In Applesoft you can prompt for user input in two ways. First there is INPUT A$ which will display a question mark on the screen and await user input followed by a RETURN. That user response then fills the variable A$. Similarly there is GET A$ which also displays a question mark but GET will only accept a single keypress as user input. My main problem with both of these is an aesthetic one: that darn question mark.

The solution is to write your own input routine leveraging machine code routines via PEEKs and POKEs. To do this, first I simulate a cursor by placing a flashing underscore character at the bottom of the screen.

101 VTAB 24 : HTAB 1 : CALL -868 : PRINT ":"; : FLASH : PRINT "_"; : NORMAL : GOSUB 55

A lot is going on in this line. The VTAB and HTAB commands position the screen cursor at line 24 and character 1. CALL -868 is a special machine code call that clears that single line of text. Now that we have an empty line we type a colon and then a flashing underscore. The result looks like this:

This looks like a user input prompt, but at this point it does nothing. The magic happens at the subroutine which is GOSUB’d at the end of that line.

55 KEY = PEEK (49152) : IF KEY < 128 THEN 55
56 IF KEY > 224 AND KEY < 251 THEN KEY = KEY - 32 : REM UPPERCASE
57 POKE 49168,0 : BUZZ = PEEK (49200) : RETURN

In line 55 we are creating a variable KEY and assigning to it the contents of memory location 49,152 to it ($C000 for you hex-heads). Turns out location 49,152 will read the keyboard and return the ASCII value of the currently pressed key. If that value is a character then we break out of the loop and go to line 56.

Line 56 insures that, if the ASCII value of the key denotes a lowercase key, it is converted to uppercase by shifting the ASCII value. POKE 49168,0 clears the keyboard buffer so that the PEEK in 55 will work next time around and not just register the same value. Finally, that BUZZ = PEEK (49200) bit triggers a speaker click so that the player’s keystroke has and audible sound.

When we return to the main game loop we now have a variable KEY which contains an ASCII value of the key pressed. I can then branch the program based on this value. I can also test if it’s a RETURN keypress and then toggle text display. Later in my program I can concatenate keypresses into a single string value by returning to that subroutine again and again until a return press is detected. That’s how I collect the OBJECT half of the VERB OBJECT pair.