A pandemic ago I decided to heed the warnings on the Apple ][ Facebook group and remove the 30-year-old battery from my Apple IIgs computer. This is harder than it should be since Apple thought it was a good idea to permanently attach this ticking time bomb to the motherboard. My solution was to clip out the old battery and solder in a plastic battery holder instead. This is not that hard to do, but I am a complete klutz when it comes to soldering. Destroy the motherboard with a mountain of silvery metal was always a possible outcome. I documented the process and present it here. Originally I had intended to do a hilariously comic narration over the video but I eventually came to my senses. Enjoy the video, video enjoyers:
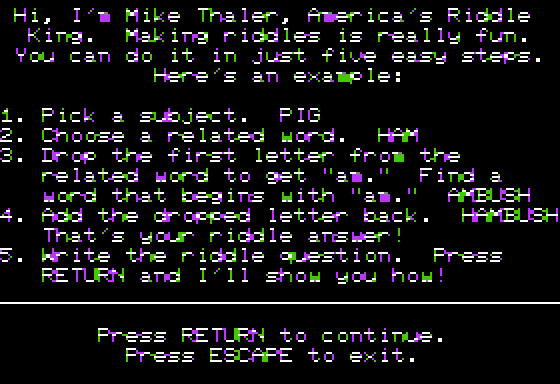
Followers of this site (ed. yeah like that’s a thing) will remember a few years ago I created a in-browser playable version of the Applesoft BASIC game Haunted House for this site. Over the past month or so I got it in my head to push my skills as a programmer and make a much more fully realized version of the game. Today I am releasing my new version of the game, Haunted House: Remastered! It’s a vast improvement on the original in almost every way possible. In other words, it’s actually fun to play.
While it’s nowhere near the level of sophistication of an Infocom game, I think it does some pretty impressive stuff (for my skill level as a programmer). It’s still a two word parser, but the vocabulary is increased. There are full-page help screens, triggered story events, a retro-styled monochrome monitor look, and a bunch of scary sound effects! Please take a few minutes and give the game a try. It’s not too long and I try to keep the puzzle reasonably fair.
Now that my memory issues are seemingly under control, let’s take a look at my modifications to the parser. Normally, in these types of graphical adventures the player enters two words in the form of VERB OBJECT. My interface limits the number of verb choices and allows the player to enter a verb with a single keystroke.
In Applesoft you can prompt for user input in two ways. First there is INPUT A$ which will display a question mark on the screen and await user input followed by a RETURN. That user response then fills the variable A$. Similarly there is GET A$ which also displays a question mark but GET will only accept a single keypress as user input. My main problem with both of these is an aesthetic one: that darn question mark.
The solution is to write your own input routine leveraging machine code routines via PEEKs and POKEs. To do this, first I simulate a cursor by placing a flashing underscore character at the bottom of the screen.
A lot is going on in this line. The VTAB and HTAB commands position the screen cursor at line 24 and character 1. CALL -868 is a special machine code call that clears that single line of text. Now that we have an empty line we type a colon and then a flashing underscore. The result looks like this:
This looks like a user input prompt, but at this point it does nothing. The magic happens at the subroutine which is GOSUB’d at the end of that line.
55 KEY = PEEK (49152) : IF KEY < 128 THEN 55
56 IF KEY > 224 AND KEY < 251 THEN KEY = KEY - 32 : REM UPPERCASE
57 POKE 49168,0 : BUZZ = PEEK (49200) : RETURN
In line 55 we are creating a variable KEY and assigning to it the contents of memory location 49,152 to it ($C000 for you hex-heads). Turns out location 49,152 will read the keyboard and return the ASCII value of the currently pressed key. If that value is a character then we break out of the loop and go to line 56.
Line 56 insures that, if the ASCII value of the key denotes a lowercase key, it is converted to uppercase by shifting the ASCII value. POKE 49168,0 clears the keyboard buffer so that the PEEK in 55 will work next time around and not just register the same value. Finally, that BUZZ = PEEK (49200) bit triggers a speaker click so that the player’s keystroke has and audible sound.
When we return to the main game loop we now have a variable KEY which contains an ASCII value of the key pressed. I can then branch the program based on this value. I can also test if it’s a RETURN keypress and then toggle text display. Later in my program I can concatenate keypresses into a single string value by returning to that subroutine again and again until a return press is detected. That’s how I collect the OBJECT half of the VERB OBJECT pair.
Previously I discussed the overall structure of my soon-to-be hit adventure game. Well, last night was a milestone. I managed to write an Applesoft program so epic that it overwrote the high-resolution graphics page. Compared to other programs I have seen, mine isn’t that huge. Around 250 lines isn’t that huge, right? Transylvania clocks in at 464 lines.
I think the issue is the number of arrays that I am defining. For now I think I have a fix. I have set LOMEM: 24576 at the top of my program. Supposedly, this will force the interpreter to define variables in a memory location after the hi-res pages. We shall see.
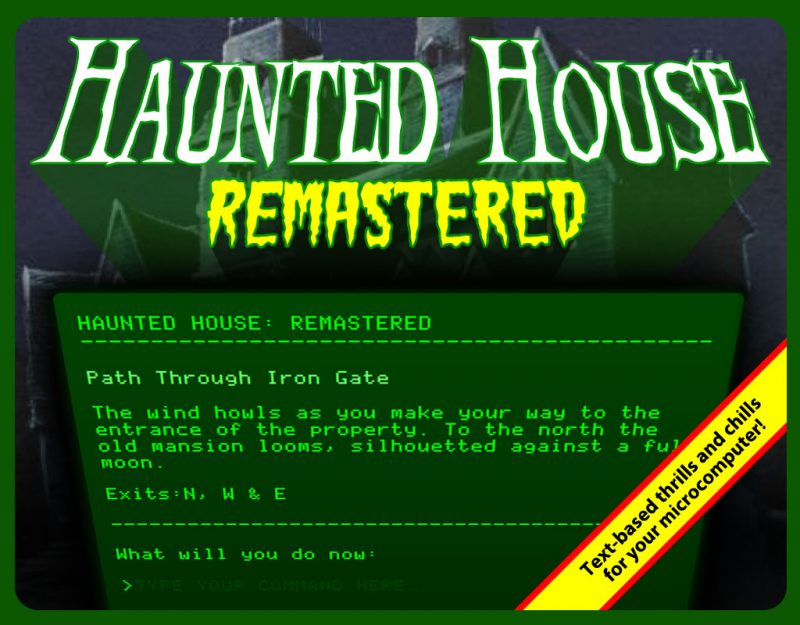
In any event, the game is back and running again. And the text screen now has some text formatting enhancements:
One of the cooler things I have implemented is this text screen. If at any prompt you hit RETURN you turn off the hi-res graphics and can see this text screen. Here will be some valuable game info included the location’s name, exits and any TAKE-able objects. The code for this is rather simple:
58 IF GM = 1 THEN GM = 0 : TEXT : RETURN
59 GM = 1 : CALL -3100 : RETURN
GM is a flag which tracks where you are in graphics mode (1) or text mode (0). CALL -3100 triggers the hi-res graphics screen without erasing its contents. So exciting, right!?!
The previous post in this series explained how to get Graphics Magician images to display from Applesoft. Now, I’d like to go over the structure of the program listed in Write your Own Adventure Programs. The bulk of the program listing consists of the game data including objects, room descriptions, verbs and state flags. Most of the remaining code is comprised of a series of conditions that check how the player’s actions affect the objects in the game world.
Verbs
Haunted House used a simple, two-word input parser: VERB NOUN. But I wanted this new game to simplify the number of verb choices in the same way the LucasArts adventures streamlined the interface of Sierra-style adventure games. The player will be limited to around a dozen verbs that are entered with a single keystroke.
The verb list is largely based on the options in Monkey Island. PUSH and PULL have been combined into MOVE. To move you must hit Go then enter either North, South, East, West, Up or Down. This is a little annoying, but there are only so many letters in on the keyboard and I needed that D, U and S elsewhere. Other commands require you to hit the keystroke, then type out an object NOUN and then hit Return. “Guess the verb” will no longer be an issue… welcome to 21st century “guess the noun” technology!
Each verb then get’s its own subroutine which contains the logic that triggers the various game actions (or provides a default message if nothing special happens). By assigning a number value VB to each verb, I can use the following to branch to the various subroutines: ON VB GOSUB 1000,600,800,850, ...
Game Data
The game data is set in the program by assigning strings and numbers to several arrays. In Applesoft you need to declare the size of an array by dimensioning it with the DIM command. For the rooms I will set the size of the rooms array to the number of rooms RM by declaring DIM RM$(RM). Then, near the start of my program I read data into the array by using GOSUB to a loop like this:
5000 DATA "Room description 1","Room Description 2", [...]
5005 FOR I = 1 to RM : READ RM$(I) : NEXT
5010 RETURN
The DATA can be listed anywhere in the code and it’s important to make sure that there are exactly as many data strings as READ commands. Otherwise, you might get OUT OF DATA errors.
This method of declaring rooms and object will eventually make your Applesoft program very long and hard to edit. I was pretty sure that I could figure out a way to read the data in from an external text file. But more on that later.
In my previous post I wrote about the impetus behind this project. To start, I knew that my code was going to be structured around the Haunted House program in the excellent book Write your Own Adventure Programs for your Microcomputer. As I have written before, this book was crucial in my development as a programmer (I haven’t developed much beyond it). I would love to do this project in 6502 machine code and I have been trying very hard to learn 6502 assembly programming. But, although I’ve gotten a better understanding of machine code, there’s serious lack of noob-friendly practical learning exercises available out there. Sure I can draw pixels at lightning speed, but, after reading most of Assembly Lines, I still have no idea how to do a simple INPUT command or mimic an array.
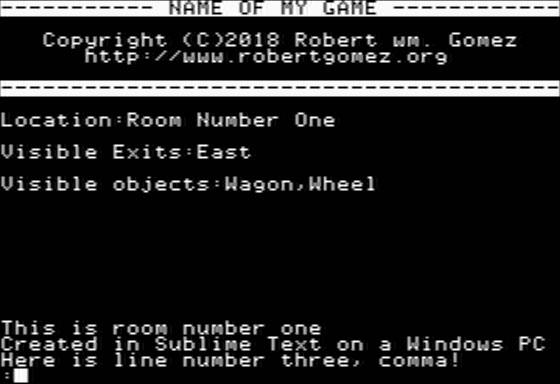
So, Applesoft BASIC it is! With emulation and modern computing I have been able to develop my code on a Windows PC and then quickly run it in emulation. My workflow isn’t nearly as fancy as some other retro-programmers. I type my Applesoft in a text editor, then in AppleWin I paste the entire code listing into an emulated apple using SHIFT+INSERT. The benefit of using emulation as a development environment is that you can throttle the emulation to run hundreds of times faster (hit ScrLK) than real hardware. This makes testing small changes a breeze.
My first task was to see if I could successfully load a Graphics Magician image into a program. The program itself is a bit of a UI nightmare. Without a manual or reference card, it’s nearly impossible to know what keys do what. On top of that, the program requires that you use a joystick to move the drawing cursor on the screen. Fortunately, the manual can be found online and you can use a PC mouse as a joystick within AppleWin. I managed to crank out a couple of silly images for testing and save them to my game disk.
I then used to code provided in the manual to write a simple Applesoft program that displays the image:
1 PRINT CHR$ (4);"MAXFILES1"5 HIMEM: 32768
10 PRINT CHR$ (4);"BLOAD PICDRAWH"
20 PRINT CHR$ (4);"BLOAD ROOM1.SPC,A32768"
30 HGR
40 A = 32768:HI = INT (A / 256):LO = A - HI * 256: POKE 0,LO: POKE 1,HI50 CALL 36096
In order for this code to work, you are required to copy PICDRAWH from the Graphics Magician disk to your disk. This is the machine code rendering engine that is loaded into memory at the top of this program. The MAXFILES1 DOS command apparently frees up some memory by limiting the amount of open files. This command needs to be the first one in your code, before any string assignments, etc. I think HIMEM does something similar with allocating memory locations. I have never written an Applesoft program so large that it required memory management so the purpose of these commands alludes me somewhat. As this project grows, I may have to familiarize myself with them.
You will see CHR$(4) often in Applesoft programs. CHR$() is a function that retrieves the keyboard character in assigned to the numerical value in then parenthesis. For example, PRINT CHR$(65) prints the letter A. In this case, character number four is the equivalent of keying in CTRL+D. That instructs the computer that the next PRINTed string should be executed as a DOS command rather than PRINTed to the screen.
The Graphics Magician file is ROOM1.SPC. BLOAD ROOM1.SPC,A32768 loads the drawing code into memory location 32768. That seems like a crazy random number but it is actually $8000 in hexidecimal. HGR switches to high-resolution graphics mode and then line 40 stores the memory address of the picture into a location PICDRAWH will know to look. Finally, the CALL 36096 triggers the PICDRAWH draw routines.
There’s a lot of fancy stuff going on here, but it does the job as advertised. The Graphics Magician manual also goes deeper with more code that shows how to string multiple images into slide shows and how to overlay objects over backgrounds. More on that when I get to my object code. For now, this proof-of-concept was enough to get a simple working prototype up and running.
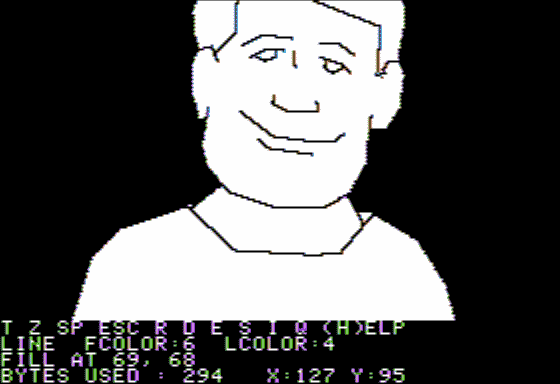
Having recently played the Apple ][ game Transylvania and its sequel, I was inspired to mess with the art program which those games used. The Graphics Magician was a huge hit for Penguin Software, but I never actually had a chance to use it when we had an Apple ][. I just remember it being advertised in every computer magazine I had.
My go to art program back in the day was always Alpha Plot from Beagle Bros. It wasn’t the easiest software to use. In fact, it came bundled with a cardboard overlay for your keyboard so you had an immediate reference as to what the various keys did. Still, I managed to draw pixel by pixel and create masterpieces like this:
The Graphics Magician is something altogether different though. Instead of meticulously drawing each point on the screen, you create images programatically using a language of lines, fills and brushes. The end product is what today we would call vector art.
The advantage of vector art is that file sizes are small. The other advantage is that these drawing routines can be used within one’s own Apple ][ programs.
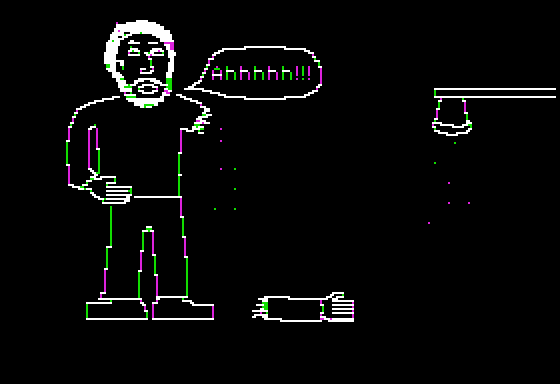
This gave me an idea for a project. Take the text-based adventure game I had made years ago, and use these routines to add graphics to the game. As I type this, I am already pretty far along in the project, but I will be going back and documenting my progress. Hopefully someone might find this informative and, if I am able to follow through, maybe I will have a releasable game in the end. It’s doing more than I ever imagined already:
I recently took the time to sample all of the default sounds from the Apple IIgs music composition program The Music Studio for use with my new sampler. The sounds were recorded directly out of my IIgs via an Applied Engineering sound card and into the Octatrack. I then took the WAV files into my PC and cleaned up the audio a bit. The IIgs outputs a rather noisy signal.
The samples are organized into four sets: Jazz, Rock, Classical and Voices. Each set has about fifteen instruments and each instrument was sampled at six octaves of C. Jazz also contains a couple drum kits which I broke apart and sliced into eight notes each. I tried to create nice evenly sliced sample chains but they are a tad off so they require a little manual tweaking after auto-slicing them.
The Music Studio was one of the first music composition programs I ever used. Certainly, it was the best one I had used up until that time. Technically, the first would have been Will Harvey’s Music Construction Set on the Apple ][+ with a Mockingboard sound card, but I don’t think any of my compositions from that program have survived (I’ll have to dig around my old disks one of these days). Fortunately(?), my IIgs compositions have survived and have been imaged and archived. Now such classics as “Kill Your Mama” and “Robert is Coll” have been preserved for the ages. Most of what we did in The Music Studio was transcribe my brother’s heavy metal guitar tab sheet music. So there’s a lot of G’n’R and Metallica riffs.
What made the program so cool (or “coll” if your are my typo prone teen aged self) was the inclusion of drum sounds. In hindsight, really bad drum sounds but drums nonetheless. It was my first real go at creating electronic music. I had no idea how performers like Cabaret Voltaire or even Devo were able to program their keyboards to play music automatically. There was that Jan Hammer Miami Vice video where you actually got a glimpse of a computerized rig (probably a Fairlight or something else that cost more than a car) and this seemed about as close to that as I could ever get.
Unfortunately, The Music Studio had a lot of quirks that made it really difficult to use. Although it uses a standard music staff for notation, it really plays notes like a piano roll. Meaning, if you have a whole note you want to ring out under several quarter notes you have to insert a bunch of redundant looking rests above the whole note. Otherwise, it plays the entirety of that long note before playing the quarter notes that are after it. Confusing, yes. Practically speaking, what this means for the composer is they have to put a bunch of evenly spaced rests across the top of the song scroll to insure the play head keeps moving along. The other major limitation is that you can’t have two instruments play the same note at the same time. That made any sort of complex arrangement a matter of spacing instruments across the staff all while avoiding your kludge of rests.
Until I was exposed to MOD files and tracking software on my PC this is how I thought music was made on a computer. Even Q-Bob’s music was created using a similar looking MIDI composition program. FastTracker and MadTracker freed me of this notion and from there on I began to make music more in line with what I wanted to do as a teen.
The Music Studio did have a very recognizable sound though. If you ever played Dream Zone you know exactly what I mean. These samples now allow us to get some of that distinctive sound into modern music apps and hardware. So, use the link at the bottom to download the set for yourself. In the meantime, here’s the first composition I made using the samples:
The past few weeks I have been diving into the world of assembly language programming on the Apple ][ computer. My interest in the topic stems from the recent book release of a compilation of articles on assembly language programming called Assembly Lines: The Complete Book. The articles were written by Roger Wagner and originally published in Softalk magazine back in the early eighties. This edition was edited by Chris Torrence and is available for download and purchase from a number of locations.
Now, I am pretty familiar with Applesoft Basic programming, but I was always in awe of commercially released software on the Apple ][ that ran so fast, had fancy hi-res graphics and used sounds other than the system beep. What was the secret of these mythical programs that required you to type “BRUN” in order to get them to load? The secret was machine language.
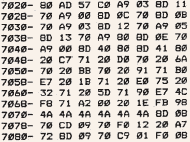
This image shows you just how intuitive and user-friendly machine code is. It’s almost like it was written by the Terminator himself (just after he finished cutting out his eyeball with an Xacto knife). Despite the seeming impenetrability of machine code, in the past I made a few attempts to learn it. I would get a few chapters into Apple Machine Language and then the endless diversions into binary math would addle my art-school trained brain. It never really clicked for me.
What I didn’t know is that there was this thing called “assembly language” which is a human-readable method of creating machine code. It still is pretty brutal compared with Basic or JavaScript, but for the first time I think I am starting to understand machine language and, more generally, just how the Apple ][ works. Cryptic hex numbers and even the aforementioned binary math are still a part of assembly, but it uses three letter abbreviations for various functions and allows for comments and labels. The assembler will translate the letters into their numeric machine language equivalents and assemble the source code into a BRUN-able program. Woo-hoo!
The first hundred pages or so of Assembly Lines has been very informative and I have dutifully typed in many of the example programs. At one point I had a pretty nice “ah ha!” moment when I was messing around with creating tones. I created a small program that generated an annoying high pitch noise and decided I would further enhance the interactivity by outputting a stream of numbers to the screen showing the paddle positions. Before I got very far beyond just reading the paddles I noticed that I could use the joystick to change the pitch of the sound. I had no idea why this would change the pitch so I decided to look at the machine code in the built-in paddle routine. To my surprise, I was able to see that it got the paddle value by using a count down loop. The longer the count down, the lower the tone. I couldn’t really say why this was the case, but at least I was starting to be able to decipher that wall of hex values.
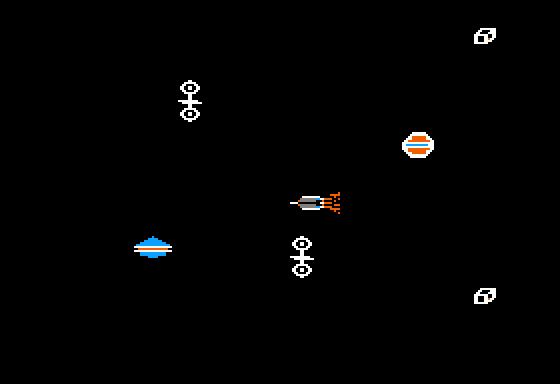
Now, back in the late eighties I got my hands on an issue of Compute! magazine. Kids nowadays with their fancy iWatches and download services may not believe this, but in the olden days there would be program listings in computer magazines. Readers could carefully type in the program and, “Voila!”, you had new software to use. This issue contained a listing for a game called Space Dodger, with a separate listing for just about every machine available at the time. Most were written in basic, but the one for Apple ][ was pure machine code. I had no idea what any of it meant, but I dutifully typed every line into my Apple’s monitor. The result was a pretty slick little arcade game:
You moved your ship to avoid the space junk which flew by from right to left at varying speeds. However, playing the game in emulation, I noticed a slight problem: the ship movement was mapped to the wrong joystick axis.
And now we get to my second assembly language “Ah ha!” moment. I now know the memory address where the paddles are read. I just needed to search the code listing for 00 1E FB and it would just be a matter of changing the 00 to 01. I found the values at $706B, made my edit and, magically, the joystick now worked correctly!
I still have no clue as to what the other 99% of the code does, but this was a breakthrough. Assembly language… I think I can do this. In the meantime, download Space Dodger and play it in your favorite emulator.