QBob Progress Report #7
QBob: Remastered now has an official launch date: July 24th, 2025! Here is the QBob: Remastered Store Page on Steam. Please wishlist it on Steam today! Also, watch the launch trailer below:
Read the previous Devlog post.
Moving images and other hard drive consuming media.
QBob: Remastered now has an official launch date: July 24th, 2025! Here is the QBob: Remastered Store Page on Steam. Please wishlist it on Steam today! Also, watch the launch trailer below:
Read the previous Devlog post.
A ton of work has gone in to QBob since my last report. There are only one or two little audio bits missing and maybe some tiny graphical tweaks. In the coming weeks I need to get this pre-alpha version out to some play testers to see if there are any bugs of major design flaws that I have missed. It’s really hard to get perspective on a project that you’ve been immersed in for half a year,
A huge amount of time in the last month has been devoted to playing the levels at all difficulties and trying to balance the game. This involved trying to beat every single level in one life just to make sure it’s possible. The last three levels are really hard to beat on the highest difficulty, but not impossible. That’s good. I’m sure some 14 year old speed-runner will have no problem, but my aging reflexes are worn thin after hours of attempts.
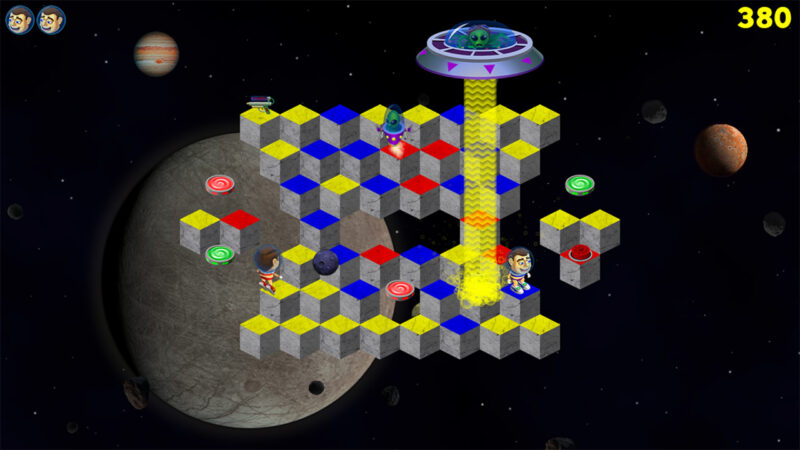
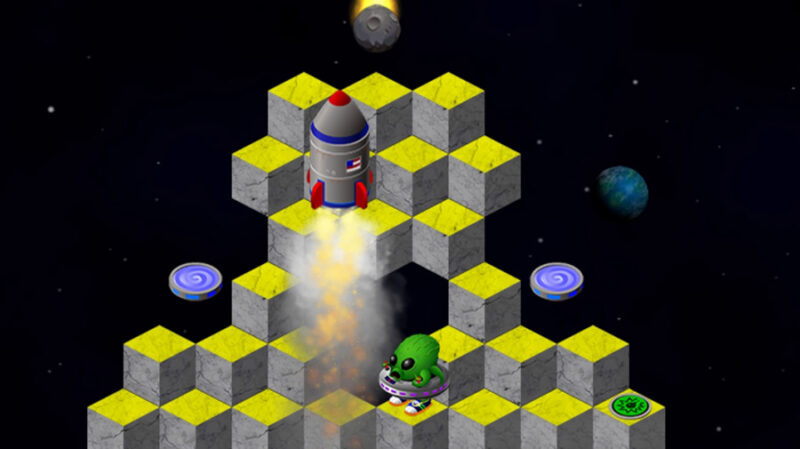
I thought I was done with game art, but I hadn’t realized how much background art was needed. When you play the game it’s hard to notice what’s going on behind the play grid, but I put a lot of thought into giving it a sort of narrative arc. It’s not exactly a story, but there is a progression from one area to the next.
The other big task has been creating all the sound effects for the game. I relied quite heavily on synthesizers and VST effects for these new sounds. One of my lingering complaints about the original QBob was our heavy reliance on mouth sounds. The new game has a much more robust soundscape to back it up.
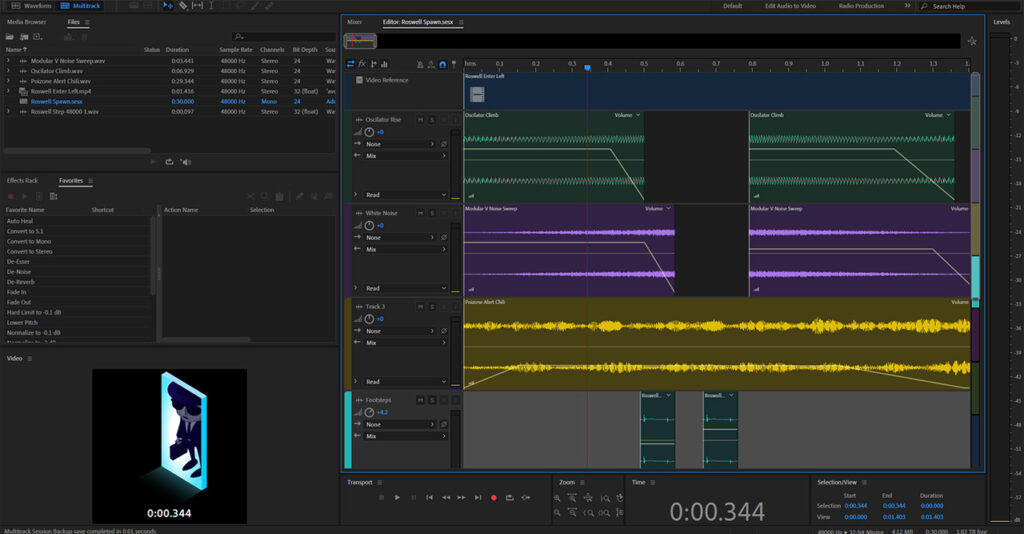
Adobe Audition was also a big help in the process. Because of its tie-in with their video editing suite, I was able to use video clips within the program to perfectly match the effects with my animations. It’s easy to forget that Audition began its life as a rebranded version of Cool Edit Pro−my sound editing software of choice in the late 90s.
The final major undertaking was to re-record all of John’s voice over work for the final level. We were able to get all that we needed recorded in-person and I spent two days processing and lip-syncing the audio. The final result is pretty great and I am exciting to have people see (and hear) it. I even edited this short video documenting my lip-syncing process:
Watch to the end to see a few seconds of final game play!
Up next is probably the most difficult part of making this game: marketing, promoting, and getting it hooked up with the various online game platforms. I really want to incorporate Steam Achievements and such, but this is all completely new to me.
As January comes to a close and despite my previous concerns, I am pleased to report that most of the new character sprites are in place. The player character was by far the most challenging character to animate, and technically I am still not done. I still need animations for using the paint gun and throwing grenades (two elements from the original game that I was hesitant to bring in to the new version). I also spent a good deal of time honing the final boss and his level’s unique game-play. I have to say the final level is looking pretty good, but it’s still seems too easy for me. That may just be a result of me having had to play it hundreds of times whilst in development.
There are still many many background elements that need to be created and animated, but I’m getting close to the next phase. Here is a brief preview of where the game it at now:
I might be going a little overboard with the particle effects, but right now I think they look great.
Wood engraving is a very unforgiving process. There’s no (easy) way to erase mistakes. We don’t have an undo function like you digital nerds with your iPads. Planning and preparatory drawings are the key to fixing mistakes before they are permanently cut into your block.
Good. You’ve done the work and have that perfectly composed drawing that’s going to put you in all the art history books. Mr. Picasso, the Louvre-er-rah is on live four. The problem now becomes: how do you get that drawing on to your end-grain engraving block?
The simplest method is to trace your design to the block placing some transfer paper between the drawing and the block. The biggest drawback to this is that it is repetitive and time-consuming. Welcome to the world of printmaking! I also find that the transferred lines will eventually rub off if you don’t spray them with fixatif. This problem doubles if you are using any sort of slippery plastic engraving material like resingrave or corian. Transfer paper is usually best if you want to get a general layout of your design without too much detail, allowing the detail to emerge through the engraving process.
If you want a very accurate transfer of your drawing I have found that the best method is to use heat to transfer a LASER printed scan of your drawing.
Let’s take a moment to ruminate on fact that LASER is an acronym for “Light Amplification by Stimulated Emission of Radiation.” What this has to do with the such-named printers and this post in general is beyond my understanding. All I know is that I, like the grammar pro that I am, am going to all-caps LASER whenever I use it.
Many sources on the ‘net will advise you to use acetone to transfer toner-based images. This sorta works, but in my experience it has a 70% failure rate. The key to getting a good toner transfer is heat. The source of that heat is a Wall Lenk L16TT Transfer Tool. It’s like a soldering iron with a disc attached to the end.
Print out your drawing (or photocopy it) and attach it, face-down, to your block. You want to be able to peek at the surface as you work, but it should be secure enough that it doesn’t shift around as you work. Heat up your transfer tool and then meticulously apply heat to the back of the printout. I drew a grid on the back of mine so that I could keep track of the areas I had worked on. You can lift the paper and peek at the results as you move across the block. It will take time and a lot more heat than you think. I was always hesitant to use this method on resingrave because I feared melting the epoxy.
Once you’ve covered the entire surface with burnished heat, you can start peeling back the paper. It will adhere more than you want and this is where acetone comes in handy. Don’t just rip the paper off, dab some acetone on the trouble spots and slowly work the paper off. If you are too hasty, paper scraps will be glued to your block. You will find that large areas of black adhere the most. For that reason, you should probably edit out large black areas on your image scan before attempting to transfer.
If all has gone well, your drawing will now appear in reverse on your block. Note that the toner will have a slight, raised texture. You can wash off the excess before printing with an acetone dampened swab if you want. Don’t let too much liquid get on the wood. You don’t want to raise the grain.
So here’s a quick video I made documenting the process:
Remember, the best wood engravings aren’t just mechanical reproductions of drawings. Let your tools and cutting guide the final appearance of your print. Get hip kids! Formschneider (cutting around a completed line drawing) is for losers and 16th century renaissance masters only!
If you have any questions, leave a comment and I will try to answer the best I can.
A pandemic ago I decided to heed the warnings on the Apple ][ Facebook group and remove the 30-year-old battery from my Apple IIgs computer. This is harder than it should be since Apple thought it was a good idea to permanently attach this ticking time bomb to the motherboard. My solution was to clip out the old battery and solder in a plastic battery holder instead. This is not that hard to do, but I am a complete klutz when it comes to soldering. Destroy the motherboard with a mountain of silvery metal was always a possible outcome. I documented the process and present it here. Originally I had intended to do a hilariously comic narration over the video but I eventually came to my senses. Enjoy the video, video enjoyers:
Here is some time-lapse footage of me cutting my latest wood engraving. See more exciting content like this on my Instagram account. (Music by Jimmy Riddle)
Here are three more videos of my Martian Law songs. These were all created in FL Studio.
This is a track from my second computer music release called, Upgrade Downgrade (2001). The music was created in MadTracker 2 on a Windows 98 PC. The voice was from AnalogX’s SayIt software and most of the samples were probably found online somewhere.
20 years ago this month I released an album’s worth of computer music. If you weren’t one of the lucky 3 people who got a CD, this is what you missed. Last night I made an *official video* for the song “March of the Mustard King.” This was pre-Garage Band. Back when making songs on a computer was like watching the code of the Matrix scroll by. Music by nerd(s), for nerds.
This is a track from my first album of computer music called, “The Exciting Sounds of a Compaq P133” (1999). The music was created in FastTracker ][ on a Windows 98 PC. This video is showing the excellent FastTracker ][ Clone from 16-bits.org.
I directed this short promotional video in anticipation of the release of my band’s new record, People Live Everywhere. It’s basically a shot-for-shot remake of a late 80s anti-drug public service announcement starring our drummer, Tony, and his daughter, Isabella.